 |
| Log Cabin 6" quilt block |
Red
|
A
|
1 @ 2” square
|
Yellow
|
B
|
1 @ 1.25” x 2”
|
Yellow
|
C
|
1 @ 1.25” x 2.75”
|
Light Blue
|
D
|
1 @ 1.25” x 2.75”
|
Light Blue
|
E
|
1 @ 1.25” x 3.5”
|
F
|
1 @ 1.25” x 3.5”
|
|
G
|
1 @ 1.25” x 4.25”
|
|
Dark Blue
|
H
|
1 @ 1.25” x 4.25”
|
Dark Blue
|
J
|
1 @ 1.25” x 5”
|
White
|
K
|
1 @ 1.25” x 5”
|
White
|
L
|
1 @ 1.25” x 5.75”
|
Green
|
M
|
1 @ 1.25” x 5.75”
|
Green
|
N
|
1 @ 1.25” x 6.5”
|
Log Cabin Block #12
Sew the (A) square
and (B) rectangle together. Sew the (C) rectangle to the (AB) unit. Sew the (D)
rectangle to the (ABC) unit. Sew the (E) rectangle to the (ABCD) unit. Sew the
(F) rectangle to the (ABCDE) unit. Sew the (G) rectangle to the (ABCDEF) unit. Sew
the (H) rectangle to the (ABCDEFG) unit. Sew the (J) rectangle to the
(ABCDEFGH) unit. Sew the (K) rectangle to the (ABCDEFGHJ) unit. Sew the (L)
rectangle to the (ABCDEFGHJK) unit. Sew the (M) rectangle to the (ABCDEFGHJKL)
unit. Sew the (N) rectangle to the (ABCDEFGHJKLM) unit.
I chose to display my Two by Two block using the Sweater #1 option.
Sweater #1 Assembly Instructions:
White
|
A
|
2 @ 1.5” x 10.5”
|
B
|
1 @ 1.5” x 10.5”
| |
White
|
C
|
1 @ 1.5” x 5.5”
|
D
|
2 @ 1.5” x 5.5”
| |
E
|
2 @ 2.5” x 6.5”
| |
F
|
2 @ 1.5” x 2.5”
| |
Background
|
G
|
2 @ 1.5” x 8.5”
|
H
|
1 @ 2.5” x 12.5”
| |
Background
|
K
|
2 @ 3.5” squares
|
Background
|
L
|
2 @ 1.5” x 4.5”
|
White
|
M
|
1 @ 1.5” x 4.5”
|
Block finishes at 12” square
Step 1: Sew the (A) and (B) rectangles together and crosscut into 2 units @ 2.5” wide and 3 units @ 1.5” wide. Sew the (C) and (D) rectangles together and crosscut into 3 units @ 1.5” wide. Sew the 1.5” wide units together to make a checkerboard that is 6.5” wide.
Step 2: Sew the 6.5” wide (ABCD) unit to the bottom of the 6.5” feature block of your choice made in the previous steps of this pattern. For the Sleeves, sew the (E) rectangles to the 2 (AB) units @ 2.5” wide.
Step 3: To complete the Sleeves, draw a diagonal line on the wrong side of the (F) rectangles, place them on the ends of the (F) rectangles and sew along the diagonal. Trim ¼” seam and press open. Sew this (FG) unit to the sleeve unit made in the previous step.
Step 4: Sew the Sleeves onto the sides of the feature block unit. Sew the (H) rectangle on top. Draw a diagonal line across the wrong side of the (K) squares and place them on the corners. Sew along the diagonal lines, as shown in red. Trim a 1/4" seam and press open.
Step 5: Sew the (L) and (M) rectangles together to make the collar and sew on top to finish the block.
Don't forget!!! You can use the cut off corners when following the shoulder instructions in Step #4 to make these bonus 2.5" half square triangles! I cut first and then sew along the cut edge to make mine. But you could also sew a seam 1/2" away from your diagonal seam at the same time. And then cut between the two seams.
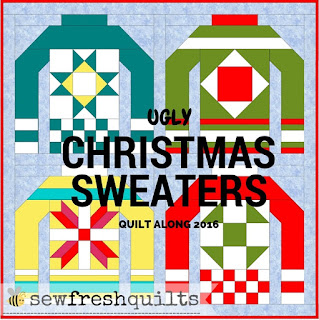
A quilt along is always more fun than quilting alone.
Want to get in on the fun?
Then grab a button below and share it on your blog!

If you are interested in quilting along, please add the button to your blog and help to spread the word. Also.... Please feel free to share via social media! And add the hashtag #uglychristmassweatersqal
Do you have a Flickr account?
We would love to have you join the Quilt Along with Sew Fresh Quilts Flickr group!
It is not necessary to purchase the pattern in order to participate. But if you would prefer the convenience of using a printable pdf pattern, Ugly Christmas Sweaters is available for purchase and includes complete cutting instructions and a detailed guide to finishing the entire quilt in any of the four different sizes listed. The pattern is available in my pattern store here.
Keep On Quilting On!


No comments:
Post a Comment
Your kind comments certainly make my day!