Sashing:
The basic building block of a quilt is a quilt block. Some quilts look fabulous by simply piecing these blocks together. Some blocks even allow for a secondary design to shine through by placing them side by side.
But some quilt blocks just seem to need a little separation to keep them from drowning each other out.
How do you put the short sashing onto your blocks? You can cut the individual sashing strips to the same size as the edges of your quilt blocks. Or you can try this Chain Sashing method by Bryan House Quilts.
In this example, the blocks are offset in the second row. The sashing strips from the first row must line up with the butterfly bodies in the second row.
Here is how I mark my long sashing strip to ensure that everything stays lined up.....
For joining sashed rows, you need to match up the adjoining rows and align the seam lines.

Use your acrylic ruler and a pencil to mark your long sashing strip. See those tiny pencil marks at the bottom of the sashing strip? Those are where the seam lines of your adjoining row will meet. Pin these rows at the matching points to secure before sewing.
Sashing does not have to consist of plain straight strips. Looking for something with a little more pizazz? Try one of these suggestions!
Wonky Sashing by Why Not Sew.
Sashing with Simple Cornerstones.
Once you are comfortable with that you may like to try dressing things up a little....
Sashing with strip sets and fancy cornerstones.
This example shows strip sets for the sashing and 9 patches for the cornerstones.
Borders:
Back when I designed my very first quilt, I had really no idea of how to make a quilt. I went searching in my local library. And stumbled upon Julie Herman's Skip The Borders. Through her display of beautiful quilts and helpful tips included in that book, I realized that when designing quilts it was a good thing to sometimes skip the borders.Some designs just look better without borders. Most 'modern' quilts are borderless. Some think that borders are for more traditional style quilts.
But borders can offer a solution to a few of these quilting problems....
Size: If your quilt is just not quite big enough, adding borders or adjusting the size of the borders can allow you to make your quilt the size you want.
 |
| https://www.flickr.com/photos/msavelsberg/8899302459/ |
Interest: Adding a border can add interest to your quilt. In this lovely sample, the white picket fence in the border ties into the white picket fence in the center medallion block.
 |
| http://tamarackshack.blogspot.ca/2013/03/wild-rose-cottage-quilt.html |
An appliqued border is particularly pretty. This colourful appliqued border adds interest and ties all the colours from the 9 patch blocks together.
| http://www.quiltersclubofamerica.com/blogs/pamela_k/archive/2013/07/25/guild-raffle-quilt-top.aspx |
A pieced border can add an interesting visual effect.

| http://sewmeblog.blogspot.ca/2013/11/mystery-medallion-quilt-border-2.html |
A scrappy border will add interest and help you to use up the scraps from making the blocks.

| http://confessionsofafabricaddict.blogspot.ca/2014/06/150-in-5-day-4-100-good-wishes-quilts.html |
A plain border can help to tame a busy quilt. And gives your eyes a place to rest.
 |
| http://www.maryquilts.com/new-churn-dash-stars/ |
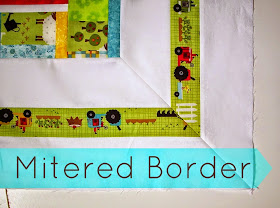
Want to do a Mitered Multiple Border? This tutorial makes it easy!
What are your thoughts on Sashing & Borders?
Do you have any helpful tips or tricks to share? Leave a comment!
Keep On Quilting On!


Great examples and ideas. I love your first border example, using borders on two edges to turn a square quilt into a (non-square) rectangle.
ReplyDeleteThanks for the tutorials on wonky sashing and the mitred border. I've rarely used sashing, and never even thought of making it wonky, but this certainly opens up possibilities! The mitred border is definitely on the agenda!
ReplyDeleteI only use borders in two cases:
- if I think the quilt design is so dynamic it needs to be fenced in, as it were; if it needs a frame to contain it,
- or if I need more width or length and can't make another row of blocks.
Great post! Thank you for all the Info! have a great week! x Teje
ReplyDeleteGreat post, instructions, and inspiration!
ReplyDeleteGreat post. It never occurred to me to mark the sashing to line things up. I'm definitely going to have to try that! Thanks!
ReplyDeleteYou used the perfect quilts to illustrate your points Lorna! Not to mention what great eye candy they are! This is a helpful lesson, even for experienced quilters.
ReplyDeleteVery informative. I always want to "wrap up" my project by the time it comes to borders and sashing...they bore me to make them!! LOL!! But you make some really good artistic points that have me rethinking...:)
ReplyDeleteGreat information, thanks.
ReplyDeleteThanks for all this info. I loved the *dolly dress up panels* on one of the links using sashing. It's given me an idea to try and make my own :)
ReplyDeleteThis is a great tut Lorna! I'm a big border person.
ReplyDeleteIf I'm not too lazy, I love a good pieced border. Sometimes it depends on the quilt and simple is better. Great information, Lorna!
ReplyDeleteI love that trick for lining up the sashing between the blocks, that step always gives me a hard time!
ReplyDeleteDo you have any tips for the width of the sashing relative to the sizes of the blocks?
ReplyDeleteThanks for the link! :)
ReplyDeleteHi dear,
ReplyDeleteThis is an amazing blog, nice to read this.Thanks for sharing this awesome one.Today I want to tell you guys One fun use of quilting patterns is to learn new quilting techniques. Members at the quiltingassistant.com have access to a comprehensive library of quilting video tutorials, eBooks, audios and more. You can select a quilting pattern to try out a new quilting technique to add uniqueness to your future quilt projects.To know more visit- quilting border patterns
Thanks
Shamim